Photoshop Composite Image
- shiraavidan77
- Feb 17, 2023
- 5 min read
Updated: Mar 23, 2023
Lately, in Photoshop, my class and I have been extensively focusing on developing composite images (two or more images combined into one image), allowing us to discover new tools and efficient editing techniques. First, as practice, we followed a step-by-step tutorial together, in which the entire class created the same composite image of a soccer player. Then, however, we were able to get more creative and flexible by making our own composite image that reflected our chosen magazine genre. Given the option to use our own images, I decided to choose some of the highest-quality pictures I have taken throughout this course to design my composite image.
Photoshop Experience
From all of the challenges I've experienced with Photoshop to the new knowledge I now have about editing, I can conclude that using Photoshop has been an interesting—yet challenging—experience. On the positive side, I was able to learn how to use tools I had never used before, such as the quick selection tool, gradient tool, camera raw filter tool, and lens flare tool. Using these tools made for a great learning experience, especially since the process was relevant and meaningful; I can implement my knowledge about these tools in the future, mainly when designing my magazine. Plus, this extensive experimental process allowed me to have fun testing different choices and expressing my creativity. In fact, while the second composite image had some standards, it was mainly individualized, meaning I was able to have a lot of control over the production.
Although I eventually was successful in designing my final products, it is worth noting that I overcame several challenges during this process, whether it was technical difficulties or general difficulties with Photoshop's tools. In fact, throughout this process, my computer often froze/crashed, unfortunately preventing me from continuing with editing. For instance, while using the raw camera filter tool, I was unable to close its browser, and it took a relatively long time to figure out how to solve this issue. Therefore, being frustrated and confused was a big part of using Photoshop...I still had fun though!

Another one of my biggest challenges was using the QUICK SELECTION TOOL, as it was difficult to "quickly" follow and highlight the edges of images, especially if an image was complex or had an intricate structure. Therefore, in some cases, I wasn't able to use the images I wanted and had to find other images that had more defined shapes. However, this tool became quicker and easier to use over time.
Composite Image #1
Below is the in-class composite image I designed, along with the composite image I was trying to follow, the images I used, and my process. Note that this was my first-ever composite image!
Model Composite Image v.s. My composite Image


Images Used


Process
Considering that before this task, I had never designed a composite image before, I believe that my final media product was relatively successful (even though there were some unintended differences between the model composite image and my composite image). These differences reflect some of the challenges I faced during this process, including using the camera raw filter tool and ensuring that I was following the tutorial's steps correctly. Regarding steps, below is the procedure that I followed to make the composite image.
I dragged the image of the soccer player on top of the image of the stadium (MOVE TOOL).
I "cut" the image of the soccer player to remove the background and only display the player (QUICK SELECTION TOOL).
This step required refining the image by increasing opacity to 100% and adding a fine edge.
Once I was done, I selected the option "a new layer with layer mask."
I lowered the image position of the soccer player (MOVE TOOL).
I created a new layer to add a lens flare.
I dragged the image of the smoke and changed the layer blend mode to "screen."
I added a layer mask, and by choosing a soft-edged brush set to 30% opacity, I painted around the subject in black to make it stand out more (BRUSH TOOL).
I changed the blend mode from "normal" to 'lighten."
I chose the option to "fill with lighten-neutral color (black)."
I changed the type of Lens Flare to 105 mm and the brightness to 80.
I moved the lens flare toward the soccer player's arm and lowered the opacity.
I dragged the image of the snow above the top layer, selecting the "screen" blend mode and lowering the opacity.
I combined all of the layers, creating a composite layer.
I edited the composite layer's saturation, shadows, contrast, vibrance, and vignette with the camera raw filter.
I added a light sun flare.
I created a new layer.
I set the gradient's foreground color to transparent and yellow (GRADIENT TOOL).
I dragged down from the top corner about halfway diagonally to create the flare.
I changed the blend mode to "soft light."
Composite Image #2
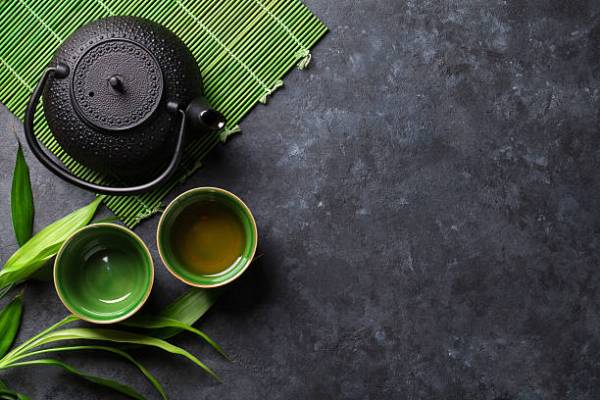
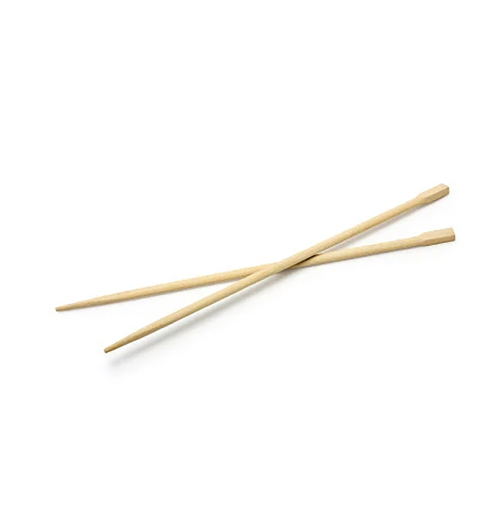
Thankfully, I was able to implement what I learned while making the previous composite image into my second one. I decided to design my composite image as a spread of Asian dishes that I have photographed throughout this course, including tuna tartare, sushi, sashimi, and bao buns. To support these images, I added several other images that weren't mine and were found on Google, such as a Japanese teapot set, soy sauce, and chopsticks. I attempted to structure these images similar to one of Food & Wine's cover pages, in which one dish takes up a majority of the page, while small dishes are scattered around it.
MODEL COMPOSITE Image v.s. My COMPOSITE Image

Images Used
The first four images are MY own images, while the last four images are images from GOOGLE.


Process
1. I started with a blue marble background, but as I was unsatisfied with the color, I adjusted the temperature, shadows, whites, blacks, and vibrance of the image with the CAMERA RAW FILTER TOOL. The image to the right is the final product that is currently the background of my composite image. During this step of the project, I was able to learn how to properly repair images on this tool by enhancing certain elements of an image.


2. Using the QUICK SELECTION TOOL, I quickly cropped out the background for my first image—a technique that I considered to be the most useful when I designed both composite images.


3. After repeating the previous step two more times with two other images, I used the BRUSH TOOL, more specifically the "soft round pressure opacity" brush to create realistic shadows around my images. I also rearranged one of my images and added other images that helped fill in empty space, including chopsticks, soy sauce, and a Japanese teapot set.


4. Using the FILTER TOOL, I added a 105 mm prime lens flare that had a brightness of 134%. Just like the first composite image, I used the color yellow, as I thought it would stand out the most in comparison to the other dark elements in my composite image (e.g. the dark background). After originally adding only one lens flare in the top right-hand corner, I decided to add another one in the bottom left hand-corner since I thought that it added a nice touch to the image.


Overall, since I had a very fun time using Photoshop for the past two weeks, I am very excited for our next Photoshop assignment!


Comments